Nest Doorbell Not Sending Notifications: What are the Solutions?
Almost anything that a security camera can accomplish, a Nest doorbell can do as well. The error frequently denotes troubles with your phone’s notification settings and Wi-Fi connectivity.
Make sure that the settings for notifications are turned on if you want the Nest Doorbell to start sending notifications. Notifications are also impacted by some settings, such as Do Not Disturb and Battery Optimization.
I will walk you through several solutions in this article to resolve the nest doorbell not sending notifications problem.
Key Takeaway

Nest Doorbell Not Sending Notifications: Possible Fixes
Try each of the workarounds listed below, and then choose which one works best for you. Let’s begin with that in consideration.
1. Restart the Nest Doorbell
The first thing you should do is try restarting the impacted device. This will update all of its underlying settings, which may resolve the relevant problem.
- Consequently, to restart your camera, tap the reset button on the rear of your smartphone for about five seconds.
- For the doorbell, push and hold the reset pinhole located on the back of the gadget for approximately five seconds.
- Now see if that resolves the Google Nest Camera & Doorbell’s no-push notification issue.

Related Article: How to Fix When Your Nest Doorbell Green Light on But Not Working?
2. Verify the Power and Connectivity of Your Doorbell
Verify the connectivity and power of your Nest doorbell. Your doorbell won’t sound a warning if it’s offline. You won’t receive any updates regarding events taking place at your doorway as a result.
Verifying the power of your Nest doorbell
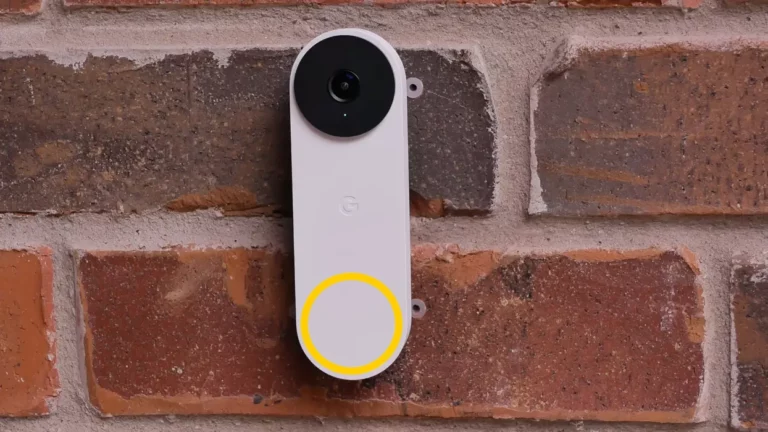
- Check the Nest doorbell’s status light.
- The doorbell will blink red, yellow, or solid blue when the power is off, or it will blink solid blue when there is an issue.
- If you have a wired doorbell, check the power cable.
- safely plugged in
- Not a single weak connection
- In case your doorbell runs on batteries, you may check its battery level via the Nest app.
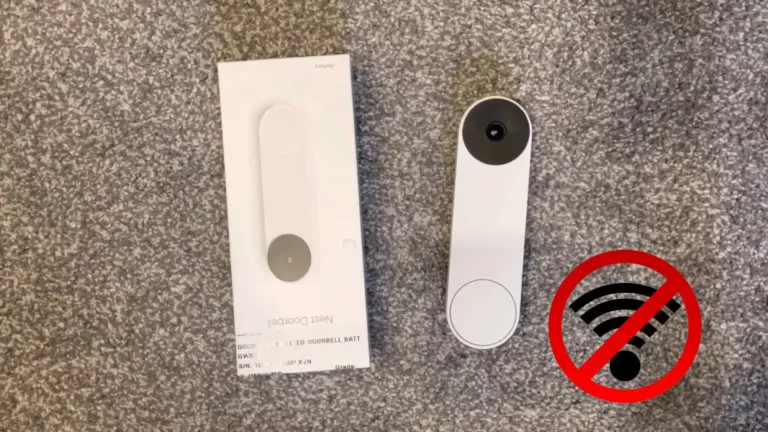
Monitoring the connectivity of your Nest doorbell
- Launch the doorbell app for Nest.
- Open the Devices menu.
- Choose the doorbell that you wish to examine.
- Locate the section labeled Device Status.
- If your Wi-Fi signal is weaker than three bars, relocate the doorbell towards your router.
3. Turn Off and Turn on Notifications

Here is how you can do it.
- First, turn off and then back on the toggle for Push Notifications a few times.
- In the same way, you ought to turn on the notifications for each “Zone” appropriately.
- After that is finished, select the Google Home app from the list by going to Settings > Apps.
- Verify whether it resolves the Doorbell’s push notification issue.
Related Article: Is Your Google Nest Doorbell Offline but WiFi Working?
4. Switch Off Your Phone’s Do Not Disturb Mode
When you are working, sleeping, or attending a conference, the Do Not Disturb Mode comes in handy. To ensure you are not disturbed, it mutes all incoming calls and notifications. But it also stops your Nest doorbell from sending you notifications.

What you should do is as follows:
iPhone
- Access Control Centre by swiping down from the upper screen.
- Press and hold the Crescent Moon symbol to disable Do Not Disturb.
Alternative method:
- Launch the Settings application.
- Toggle off “Do Not Disturb.”
- Turn off the Do Not Disturb switch by flipping it.
Android
- From the home screen, swipe down to access Quick Settings.
- To turn off Do Not Disturb, tap its icon.
Alternative Method:
- Launch the Settings application.
- Click on Notifications or Sound.
- Press the “Do Not Disturb” button.
- Turn the Do Not Disturb switch off.
There are scheduling settings for Do Not Disturb mode on some Android phones, which let you programme when it turns on and off automatically.
Related Article: How Long Does Nest Doorbell Battery Last: A Comprehensive Guide
5. Create a New Home Profile
Another clever workaround that many found effective is to remove the device from the home profile that is now active, make a new one, and then configure your device inside of it.
It’s undoubtedly a drawn-winded process, but if things turn out well for you, the time invested will be worthwhile.
- Open the Home app, choose the Nest device, and press the Settings button at the top.
- Next, select Device > Remove from the confirmation dialogue box by tapping on it.
- Return to the app’s main screen now, and hit the + icon in the upper right corner.
- Next, choose Create New Home, hit Continue, and follow the on-screen directions to finish configuring it.
- Your device is visible in the updated profile. To pair them up, tap now.
- When finished, it ought to resolve the problem with Google Nest not allowing timers, alarms, or reminders to be set.
- Still, press the plus sign and choose Set up Device if your device isn’t showing up in the updated profile.
- After that, choose New Device to view your new device.
- Once it was set up, the underlying problem would have been fixed.
6. Turn off battery optimization
Apps that send notifications and run in the background, in particular, may not function effectively until battery optimization is applied.
To keep the Nest or Google Home apps sending notifications, you must disable battery optimization for those particular apps.
This is how you do it:
iPhone:
- Get your phone’s Settings app open.
- Proceed to Battery.
- To access the Google Home or Nest app, scroll down.
- Press the icon for the app.
- Turn the switch next to “Optimize Battery Usage” to “Off.”
Related Article: Nest Camera Offline After Power Outage: How to Effectively Deal with This Issue?
Android:
- Go to the Settings on your phone.
- Choose “Battery.”
- Search for the Google Home or Nest app.
- Turn the switch for battery optimization off.
You can increase the power consumption of your app by disabling battery optimization. Therefore, carefully consider the advantages and disadvantages.
7. Turn off the low power or battery saver mode.
You may also receive notifications from the Nest or Google Home apps while in Battery Saver or Low Battery mode. To turn it off, do the following:
iPhone
- To access Control Centre, slide down from the top of the screen.
- To exit the Low Power Mode, tap the battery icon Giga Secure.
To disable it through the Settings app:
- Launch the Settings application.
- Press the battery.
- Turn off the Low Power Mode switch by flipping it.
Android
- Press and hold the upper part of the screen to reveal Quick Settings.
- To exit Battery Saver Mode, tap the battery symbol.
To disable it through the Settings app:
- Launch the Settings application.
- Press the battery.
- Turn off the battery saver switch by flipping it.
At 20% battery life, the iPhone enters Low Power Mode. Battery Saver Mode on Android begins at 15% battery life.
Related Post: Nest Doorbell No Blue Light: Causes and Fixes
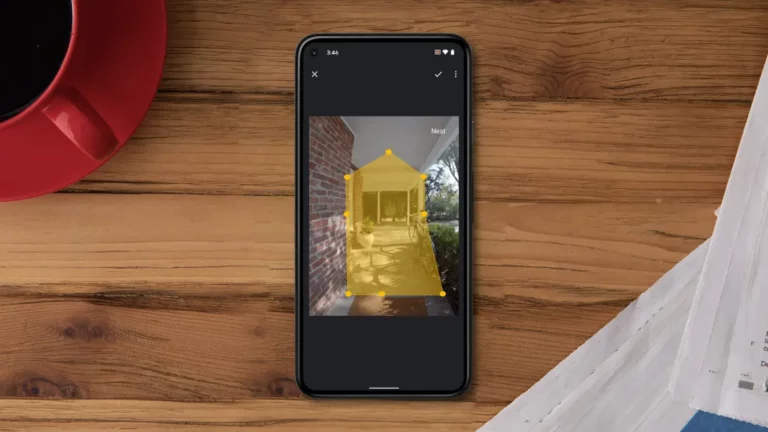
8. Modify the Activity Zones and Sensitivity of Your Camera
If you get this far and the issue persists, your camera’s sensitivity settings are probably the cause. Before you get a notification to your phone, it measures the amount of motion or sound that your camera senses.
To make it easier for your cameras to identify activity, you should adjust the activity zones or raise the sensitivity.
This is how you do it:
- On your mobile, launch the Nest app.
- To change the camera, tap on it.
- Choose Settings.
- Navigate to the Activity Zones.
- To add a new activity zone, tap the plus icon.
- You can adjust the area’s coverage by dragging and dropping the corners.
- Drag the slider to change the sensitivity.
- Select Save.
Explore Also:
Creativehouseblog
Dietsheriff
Mycleanseplan
You may receive irksome notifications from the camera if you set the sensitivity too high.

Related Post: Nest Doorbell Stuck Zoomed In: Causes and Fix
Frequently Asked Questions [FAQs]
How can I set up notifications on my Nest Doorbell?
1. Launch the Nest application.
2. From the main screen, select Settings.
3. Choose Notifications.
4. You can select Nest Home Report or Rush Hour Rewards choices, or you can choose the Nest product for which you wish to modify notifications.
What distinguishes push notifications from notifications?
The app itself delivers and schedules local notifications on the smartphone. The cloud systems for iOS and Android (APNs and Firebase Cloud Messaging, FCM, respectively) are used to deliver push alerts to the app.
Why isn’t my Nest Doorbell picking up motion?
Verify that it is installed appropriately, that the open/close magnet and Detect are aligned, and that the sensor is clean.
What are push notifications?
Something like a sports score, a flash sale invitation, or a download discount are examples of push notifications—messages that appear on a mobile device.
Why should I allow push notifications?
Because of how they are delivered, push notifications are better than email and other means of contacting customers.