Nest Doorbell Mechanical Chime Not Working: 8 Effective Ways to Fix this Issue
Do you ever wonder why, when someone rings your doorbell, the Nest doorbell chime doesn’t function? You can solve the issue by using the fix instructions in this thread.
Check your app settings to ensure the chime is activated before attempting to resolve the Nest Hello not ringing. Reset the Nest doorbell if this doesn’t work. Check the various connections, such as the doorbell and chime wire, if none of them function.
In this article, I will go through a detailed discussion about how to solve when nest doorbell mechanical chime not working.
Key Takeaway

Nest Doorbell Mechanical Chime Not Working: Possible Solutions
The following are some possible causes of a malfunctioning Nest doorbell chime:
- Your Nest doorbell’s battery is almost dead.
- The device is not functioning because of certain settings.
- The Nest doorbell is not working.
- Your location’s weather is too hot.
- The circuit breaker on your circuit is off.
- The wiring in your doorbell or chime is broken.
- The Nest doorbell chime cannot function due to an inadequate transformer voltage.
Now that we have that out of the way, let’s examine the solutions you have for fixing your chime issue.
1. Recharge the battery

Related Article: Nest Camera Offline After Power Outage: How to Effectively Deal with This Issue?
To begin repairing a Nest doorbell that runs on batteries, first charge the battery.
The battery is the primary source of power for the Nest battery-operated doorbell, as you are undoubtedly aware. Thus, performance decreases when the battery gets low, which may be the cause of the chime’s failure.
That being said, if the Nest doorbell chime stops operating, you might need to see if your battery is low.
When is the battery in your doorbell running low? When your battery is low, the Google Nest app alerts you. Should the Nest app have alerted you to short battery life, charging the doorbell will resolve the chime issue.
Remove the Nest doorbell from the mounting plate in order to recharge its battery. Afterward, place the USB cable into the doorbell’s charging port and connect it to a wall outlet or computer. The battery in your Nest doorbell will now begin to charge.
2. Verify the Power Status
Check to see if the device has power on. If not, a thorough inspection follows, focusing on any loose connections. To find any problems creating an interruption in the power supply, this important phase is evaluating the power cord and connection points.
If there appears to be a loose connection, placing an extra adaptor over the power socket is a workable workaround. This additional adapter not only fixes the immediate problem but also makes sure that the device connection is more snugly and securely fit.
This proactive strategy not only resolves the pressing power-related issue but also enhances the device’s general longevity and dependability, promoting a continuous and ideal user experience.
3. Check the Chime Settings
The Google Nest app contains some features and settings that can make the Nest doorbell chime inoperable.
For example, it’s possible that you disabled the doorbell chime in the app. With the “Quiet Time” feature of the Google Home app, you may silence your doorbell chime so that you won’t be bothered. The doorbell may have stopped chiming because you neglected to activate the Quiet Time feature.
Therefore, make sure the Quiet Time feature is activated. If so, switch it on.
To verify and activate the Google Nest app’s Quiet Time function, follow these steps:
- On your phone, launch the Google Home app.
- Press the doorbell button. Next, press More.
- Choose Quiet Time next.
- To disable the Quiet Time feature, tap Cancel now.
It’s also possible that you adjusted how long the chime lasted. The length of time the Nest doorbell chime will ring if somebody rings at your property is indicated by this feature.
Your chime may not ring at all if the duration of its ringing is too short. You probably believe the doorbell chime isn’t operating for this reason. To improve the clarity of your chime ring, lengthen its duration.
Here’s how to make the Nest doorbell chime ring for longer:
- Open the Nest mobile application.
- Press the doorbell button.
- Press the symbol for Settings. Choose Chime Duration next.
- Under the Chime Duration area, you can lengthen the chime.
Related Article: Nest Doorbell Won’t Connect to Google Home: Why and How to Reconnect?
4. Await the cooling off of the inside weather
Your Nest doorbell may automatically turn off when the temperature in your house gets unbearably hot. This aids in safeguarding the internal circuitry of the doorbell.
Fear not—when the outside temperature drops, the chime will return to its original setting.
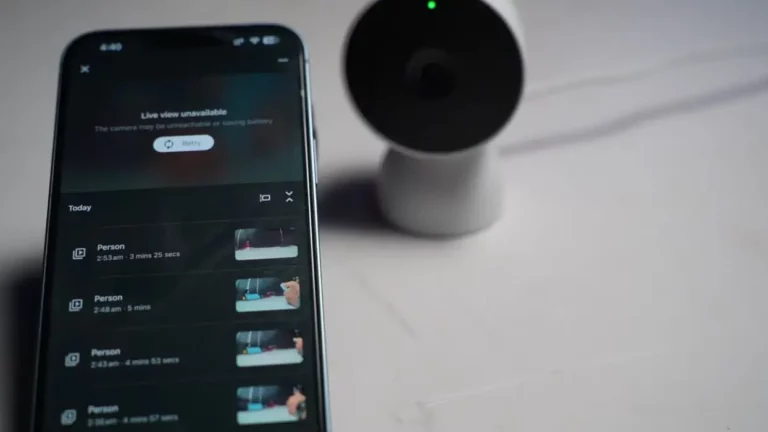
Even if your doorbell isn’t working because of the weather where you live, you can still receive notifications on your cell phone if somebody rings your doorbell.
Should this apply to you, all you need to do is bide your time till the temperature drops. After that, test if your chime is functioning effectively.
5. Hard Reset the Doorbell
You should hard reset the Nest Doorbell after making sure the power and settings are working properly, then repeat the previous two procedures.
Should something be altered when it is being used, a hard reset can put everything straight.
- Using the release tool or a thumbtack, remove the doorbell’s base by putting it into the Hello hole and pulling off the base.
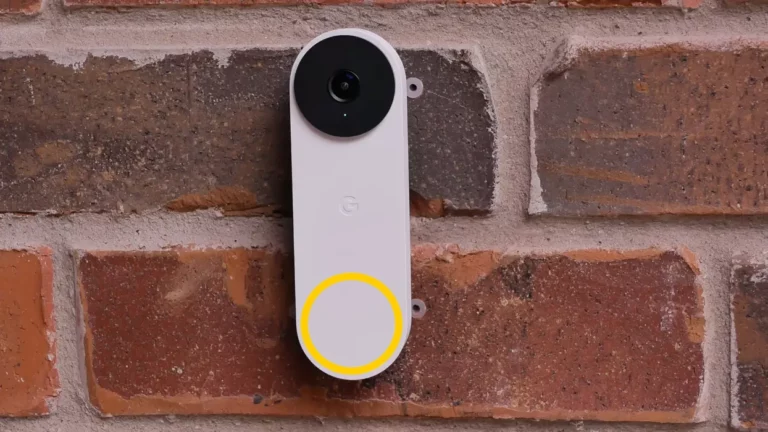
- Hold down the large doorbell button on the front of your Hello for approximately ten seconds, as well as the reset button on the back (place the release tool or thumbtack into the opening at the top):
- The doorbell will sound, spinning a blue light ring that will eventually flash yellow before all the lights go out. Next, let go of the two buttons.
- When the light ring begins to slowly pulse blue and your camera chimes, the hard reset is complete.
- Hello will show up in the Nest app as offline during the factory reset, and it will remain that way until you delete it from the app.
Related Article: Nest Doorbell Not Connecting to WiFi iPhone – Causes and Solutions
6. Turn on the circuit breaker for your Nest doorbell.
Is your Nest doorbell wired? The circuit breaker may then be turned off, which could prevent the chime from working.
Thus, making sure the circuit breaker is on is another solution to attempt if the doorbell chime isn’t ringing. Check to see if the circuit breaker for the Nest doorbell is on by going to the electrical panel. If not, activate the breakers.


Make sure the indoor power adapter is correctly plugged in if you’re using it in conjunction with your breakers.
Once you flip on the circuit breaker, your Nest doorbell should sound.
Related Article:
7. Examine your doorbell’s chime wiring
After taking care of power issues, it’s a good idea to check the chime wires, as they can be the cause of chime faults. If the cover of a mechanical chime was unintentionally blocking the wires, you can find it by taking it off and pressing the “Hello” button.
Carefully checking the wire connection of electronic chimes is necessary to make sure that the directions are followed. It is crucial to do a complete inside inspection for any broken wiring and to keep wires from coming into touch with bare metal or one another.
A local electrician can help with a thorough repair if there are over three wires involved, which will reduce the requirement for service or chime replacement. This methodical approach guarantees a hassle-free experience and a well-functioning chime Giga Secure.
8. Make Sure the Transformer for Your Doorbell is Compatible
A unique transformer and a very specific power supply rating are needed for the Hello device. In North America, the Nest device is compatible with 16–24 V AC and at least 10 VA.
The transformer may not be ready to deliver, even if it states the higher rating. To investigate if there are any further power delivery issues, try changing the transformer or getting in touch with a nearby electrician.
Explore Also:
Creativehouseblog
Dietsheriff
Mycleanseplan
For example, this can resolve problems that may occur when you use two Nest doorbells for a single chime.
Related Post: Nest Camera Offline After Power Outage: How to Effectively Deal with This Issue?
nest doorbell mechanical chime not working – FAQs
Does Nest Doorbell come with a variety of chimes?
Yes, there are various chimes on Nest Hello. Its four main themes are Winter, Hanukkah, New Year’s, and Christmas. There are 10 options for each of these themes.
Is Alexa able to play the Nest Doorbell chime?
The Alexa device must have a display and support video streaming for it to chime. The Echo Show and Spot are two instances of Alexa-compatible devices.
Are Nest Doorbells able to function without a chime?
Indeed. Alternatively, you can utilize an indoor power adapter, also referred to as a plug-in transformer to announce guests or use Google Assistant.
Could I change the mechanical chime on my own?
Indeed, changing a mechanical chime is usually a simple task. Verify that it is compatible with the Nest Doorbell model you own, then install it according to the instructions given.
Do the mechanical chime and Nest Doorbell require any special setup?
Yes. It’s important to make sure your mechanical chime and Nest Doorbell work together.
Related Post: Nest Doorbell Not Sending Notifications: What are the Solutions?